
Raised garden beds are absolutely amazing for growing plants that are healthy and thriving while also adding beauty to your outdoor space. One of the top benefits of using raised garden beds is that they enhance soil quality, promote better drainage, and allow for growing plants at a more comfortable height, which reduces the need for unnecessary bending and kneeling. When deciding between a DIY garden bed or a pre-made one, it ultimately boils down to your own personal preferences and budget. DIY garden beds are more affordable and rewarding, while pre-made beds offer convenience and ease of use.
What to Know Before Building a DIY Garden Bed
Location
If you’re thinking of building your own raised garden bed, there are a few key things you should definitely take into account.
First off, you need to carefully consider the location and size of your raised garden bed. It’s important to pick a spot that receives at least six hours of sunlight per day and has good drainage. As for size, you’ll want to make sure it’s proportional to the amount of produce you’re planning to grow and that it’s easily accessible from all sides.
Material
When it comes to materials, I always recommend using cedar or redwood boards. These types of wood are naturally resistant to rot and will last you for years to come. Finally, don’t forget to add a layer of weed barrier fabric or newspaper before filling your bed with soil and compost to keep pesky weeds at bay.
By considering these factors, you’ll be well on your way to building a beautiful and productive raised garden bed that yields healthy crops for you and your loved ones to enjoy.

Let’s take a closer look at the different materials you can use to build your raised garden bed
- Lumber is the most popular and versatile material for raised garden beds. Cedar and redwood are the top choices due to their natural resistance to rot, and insects, and durability. However, they can be more expensive than other wood types like pine, which requires treatment to prevent rot. Lumber is easy to work with. You can customize the size and shape of your garden bed to fit your needs. Plus, wood creates a natural and warm look in your garden.
- Stone is another option that adds a rustic and elegant touch to your garden bed. Stone is low-maintenance, long-lasting, and perfect for growing heat-loving plants. However, it can be difficult to work with and requires a sturdy foundation to support the weight.
- Galvanized steel and metal are durable and long-lasting materials that offer a farm chic look to your garden bed. However, they can be more expensive than other materials. In addition, they can heat up quickly under the sun, which can be harmful to some plants.
- Old wood, such as pallets or reclaimed lumber, can add a unique and eco-friendly touch to your garden bed. However, it’s crucial to avoid treated or painted wood. Some can contain harmful chemicals that can leach into the soil and harm your plants.
- Brick is a classic and sophisticated material for raised garden beds that adds a timeless charm to your garden. However, it’s challenging to work with and can be costly. My dad had brick left over around his house so I used them to build a raised bed. When working with things like stone or brick, ensure you can secure them in place. Otherwise, heavy wind or rain can cause them to shift and possibly damage plants that are growing inside.
When selecting the material for your raised garden bed, consider your budget, aesthetic preferences, and maintenance requirements. With the right material, you can create a beautiful and productive garden that enhances the look of your outdoor space.
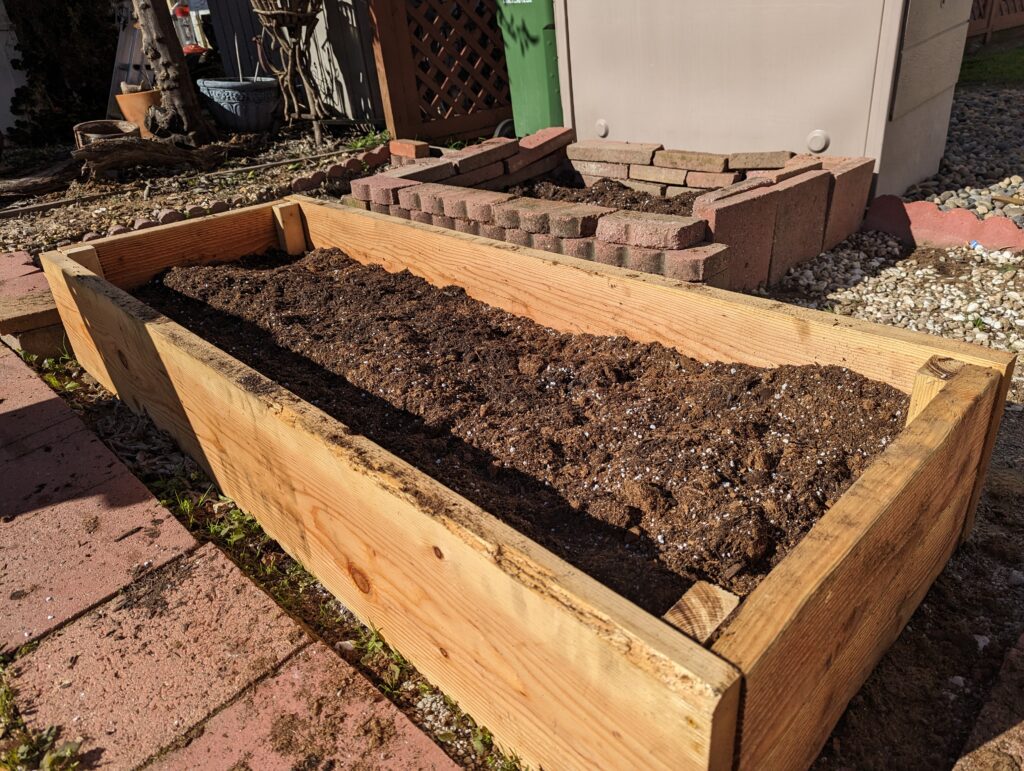
Easy Steps to Build a Raised Garden Bed with Lumber
Here’s a step-by-step guide based on my recent experience building a raised garden bed for my dad.
List of Materials to DIY Raised Garden Bed
- Pine Lumber 2x4s, 10 feet in length
- Pine Lumber board that is about 2 ft wide and 12 ft long
- Circular saw
- Speed square
- Measuring tape
- Linseed oil (for sealing)
- Drill
- Countersink drill bit
- Coated lumber screws
Step by Step Guide for Constructing the Raised Garden Bed
- Plan the size and shape of your garden bed. For this example, we used dimensions of 6 ft by 2 ft by 2 ft.
- Go to your local hardware stores, such as Home Depot or Lowe’s, to gather the necessary materials.
- Properly preparing the wood is important to ensure that the raised beds will last a long time. To do so, the first step is to apply a few coats of natural oil to the untreated wood. While I used linseed oil, there are other natural oils such as tung, refined hemp, soy, and walnut oil that can also be used to seal and protect wood. Once the oil has been applied, allow the wood to dry for at least a day before beginning the building process. This step is essential in ensuring the longevity and durability of your project.
- Use the circular saw to cut the 2x4s to the appropriate lengths.
- Use the speed square and measuring tape to ensure that the sides are level and the corners are square.
- Drill pilot holes into the boards where you’ll be inserting the screws to prevent the wood from splitting.
- Use the coated lumber screws to attach the sides to the frame of the garden bed.
- To prevent warping, you’ll need to add extra support to the corners of your raised garden bed. Extra lumber material can be used as support. Cut the wood into shorter pieces and attach them to each corner of the raised bed. This will provide added stability and ensure your garden bed stays in shape for longer.
- Fill the garden bed with soil and plant your favorite fruits and vegetables.
DIY a Raised Garden Bed with Available items

Building a raised garden bed with rocks is a great way to create a garden without having to spend a lot of money. When I was in Hawaii, my friends and I decided to create a raised garden bed using the abundant lava rocks found on the property. Here are the steps we took to create our raised garden bed:
- We collected the biggest lava rocks we could find and piled them in one spot. This pile became the foundation for our raised garden bed.
- Planning the layout of the garden bed was crucial. We needed to carefully select which rocks we would use, taking into account their size and shape. Since the rocks were not uniform in shape, we had to figure out which rocks would stack on top of each other.
- We started stacking the rocks on top of each other, ensuring that they were sturdy and stable. The process was challenging and required a lot of heavy lifting.
- We stacked the rocks to a height of about 2 ft, wrapping them around the area where we wanted our garden bed.
- Next, we filled the raised garden bed with soil and dirt, using a wheelbarrow to transport it. Filling the gaps between the rocks with soil added stability to the raised bed.
- Throughout the process, we made sure to lift with our legs to avoid back injuries.
- Finally, once the raised garden bed was filled with soil, we were ready to start planting
Conclusion
Building a raised garden bed with rocks can be a physically demanding and mentally stimulating project. But the satisfaction of creating something from materials that were available to us was worth the effort. Our raised garden bed was a success, and we created a beautiful landscape filled with ti trees and exotic plants.
In conclusion, raised garden beds are an excellent option for those who want to grow healthy plants while enhancing the beauty of their outdoor space. DIY garden beds are a cost-effective and rewarding option for those who are willing to put in the work, while pre-made beds offer convenience and ease of use. When building your own raised garden bed, it’s essential to consider factors such as location, size, and materials. Lumber, stone, galvanized steel, old wood, and brick are all popular materials for raised garden beds, each with their own unique characteristics. By following a step-by-step guide and taking the time to properly prepare the wood, you can create a beautiful and productive raised garden bed that yields healthy crops for you and your loved ones to enjoy.